Escalation Groups
Escalation Groups are used to reach group members in a specified order. Escalation Group information includes the order in which members should be contacted as well as any delay between attempts to contact members.
Response limits control how many users can reply with a specific response. When the response limit is reached, that response is no longer available. Whether notifications continue after response limits are reached is defined by Response Limit Handling on the Compose Notification Wizard.
Example: Notification Sent to an Escalation Group
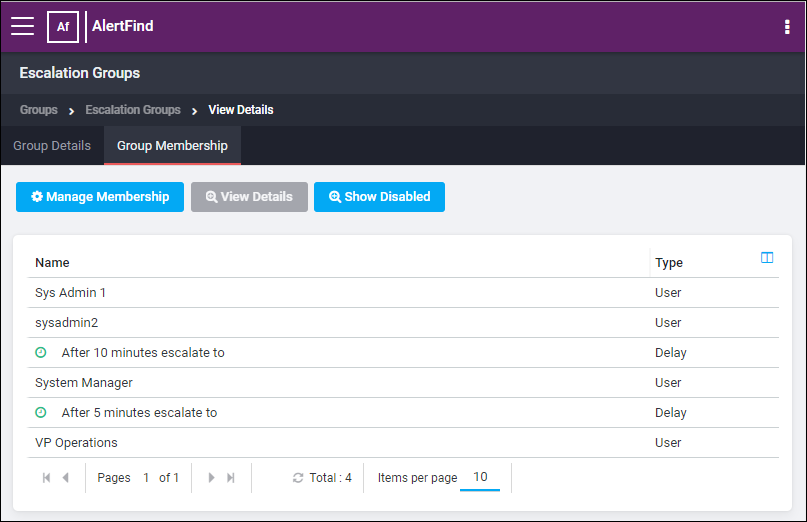
Genericorp has a IT Response Team for which an Escalation Group exists. The team and group membership includes two system administrators, two system managers, and the Vice President of Operations. The process Genericorp has in place dictates that the system administrators be contacted immediately, the system managers be contacted 10 minutes later, and the Vice President be notified within 15 minutes of the incident. The following image shows how the escalation group set up would look.
Based on this configuration, the two system administrators would be notified immediately, the system managers would be notified 10 minutes later, and the VP of Operations would be notified 5 minutes after the system managers (effectively, 15 minutes after the incident occurred).
To create an escalation group:
- Select the team context in which the group will be created.
- From the left navigation menu Groups section, click Escalation Groups.
- Click the New button at the top of the page.
- In the Group Name field, enter a name for this group. This is a required field. Group names must be unique within a group type.
- In the Description field, enter an optional description of the group.
- If a Group Quick Launch ID is to be used with for this group, type the code in the Quick Launch ID field. Group Quick Launch IDs are alphanumeric, with no spaces or punctuation allowed. If a letter is entered, AlertFind automatically converts it to a number that can be easily entered on a keypad. After the Escalation Group is created, the number will be displayed after the Group Quick Launch ID. Alternatively, click Auto Generate Unique ID to generate a random Quick Launch ID for this group.

- Click Save to move to the Group Membership tab of the Viewing Group dialog box.
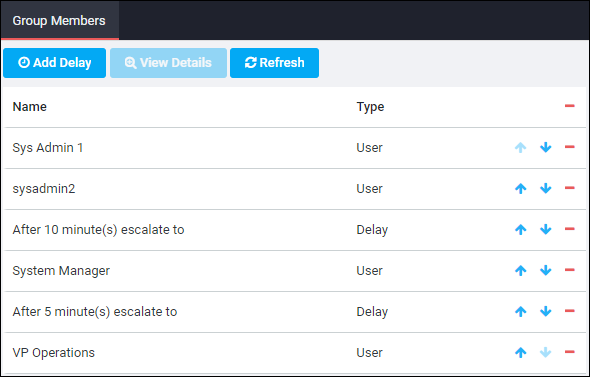
- Click the Manage Membership button to bring up the Group Membership Editor dialog box.
- In the Users tab, select the names of users to add to this group. Use the search fields provided to search by name or filter using the Criteria Editor. See Filtering Lists for instructions on using search and Criteria Editor tools.
- Click Add Selected to move them to the Members list.
- To add other groups to this broadcast group, click the Broadcast Groups, Escalation Groups or the Smart Groups tab. Select the groups to be added and click Add Selected to move them to the Members list.
- To add a delay between notifications, select the name which the delay should be added after. Click Add Delay. Type a number in the Delay (minutes) box. Click Save to return to the Group Membership Editor dialog box.
- Use the Move Up and Move Down buttons to change the escalation order, until all users, groups and delays are in the desired order.
- Click Save to create the group.
- Click Close to return to the Escalation Groups page.