Point of Sale
Learn about POS info area.
Aurea CRM allows you to store the facings of your own products (POS Monitoring info area) and those of your competitors (Competition info area) at your customers, as well as analyze the points of sale per rep and item.
POS Monitoring
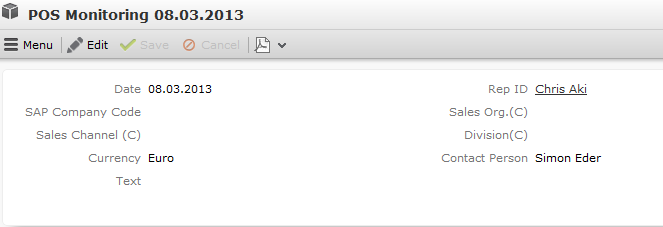
The POS Monitoring info area (POS = point of sale) is used to store facings for your own products at the point of sale on a specific date. You can store various information on your business partners. Points of sale monitoring records are always added for a company. You can add one POS monitoring record per company per day.
To add a POS monitoring record:
- The following options are available:
- Switch to the desired company and select New > New POS Monitoring from the context menu.
- Select
 (Products & Service)
> POS Monitoring. Start the search. Click on
(Products & Service)
> POS Monitoring. Start the search. Click on  (New) and select the desired company.
- Enter the following:
- Currency: The currency cannot be edited once the record has been saved. POS monitoring items use the currency entered in the POS monitoring record. The currency cannot be changed in the items.
- Date of the POS monitoring.
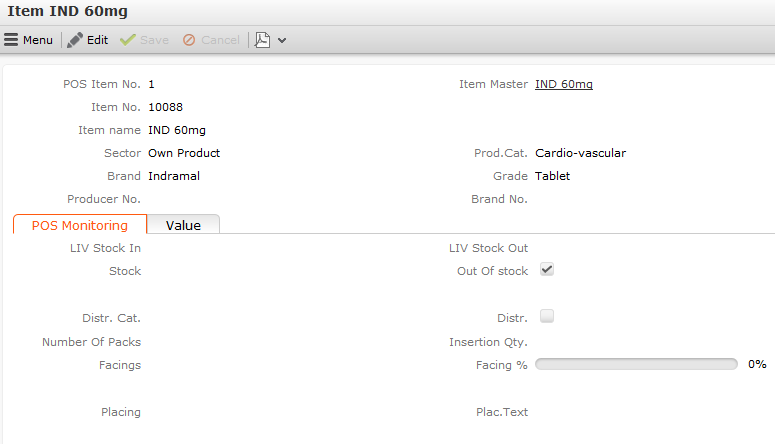
POS Monitoring Items
You can add multiple POS monitoring items to a POS monitoring record in order to store the facings at a customer at the item level. You can store stock situations, facing situations and the distribution status, so as to identify weak points and to take necessary measures.
You can either add POS monitoring items directly or select Quick Add (Items) from the POS monitoring record’s context menu to use the quick add function.
To add items to a POS monitoring record:
- The following options are available:
- Switch to the desired POS monitoring record and select POS
Monitoring Items from the context menu. Start the search and
click on (New).
- Switch to the desired company. Select Go to All Related
> All POS Monitorings from the context menu. Switch
to the desired POS monitoring record and select POS Monitoring
Items from the context menu. Start the search and click on
(New).
- Switch to the desired POS monitoring record and select POS
Monitoring Items from the context menu. Start the search and
click on
- Select an item from the Item No. field. The Item name, Sector, Product Group, Brand and Grade are entered automatically.
- Enter date on the various tabs, such as the Stock, Facings, Price etc. The Currency is transferred from the POS monitoring record and cannot be changed.
Switch to the desired POS monitoring record and select Quick Add (Items) from the context menu to use the quick add function.
recentFilterOptionsTransferring Individual Fields from Listings
You can transfer information stored in listings when adding POS monitoring data in the quick add area.
The following fields are transferred from the Listing info area to the following fields in the POS Monitoring Item info area:
|
Listing Field |
POS Monitoring Item Field |
|---|---|
|
LS-StaNo |
LS_StaNo |
|
LS-SerNo |
LS_SerNo |
|
Facings |
Agreed Facings and LS-Facings |
|
Facing % |
Agreed Facings (%) and LS-Facing % |
|
Placing |
Agreed Placement 1 and LS-Placing 1 |
|
Placing 2 |
Agreed Placement 2 and LS-Placing 2 |
|
Price |
Agreed Price and LS-Price |
|
Plac.Text |
LS-Plac.Text |
The value in the Price field in the Listing info area is transferred to the LS-Price and Agreed Price fields in the POS Monitoring Item info area. The amount is converted to the currency entered in the POS Monitoring info area. An exchange rate needs to be defined for the currency to be converted.