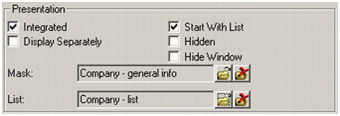
Mask
You can determine which masks are used by the workflow.
You can specify a mask for both list and mask view.
- Open the Definition dialog box by clicking on the Definition cell in the process.
- Click on the Load button to the right of the Mask or List fields. The
following dialog box is displayed:

- You can define a new mask or select an existing one. If you decide to use an existing
mask, you can choose to use either a default mask (supplied by update) or one you have
created yourself in the Mask generator, see Mask Generator
in the Win Administrator Guide.

You need to select a mask, otherwise all data is displayed as if you had selected the Data > All Mask Fields option and the workflow generates errors whenever you double-click in the mask (unless you have disabled the default action, which is to switch views).
Note: You can edit existing masks in the mask generator. Start the mask generator (either
using the Define Mask button or from the database module by selecting Extras >
Edit Mask) and load the desired mask (File > Load).
Use conditional formatting from info area
Enable this option to apply the conditional formatting defined for the info area to the workflow level.