Configuration
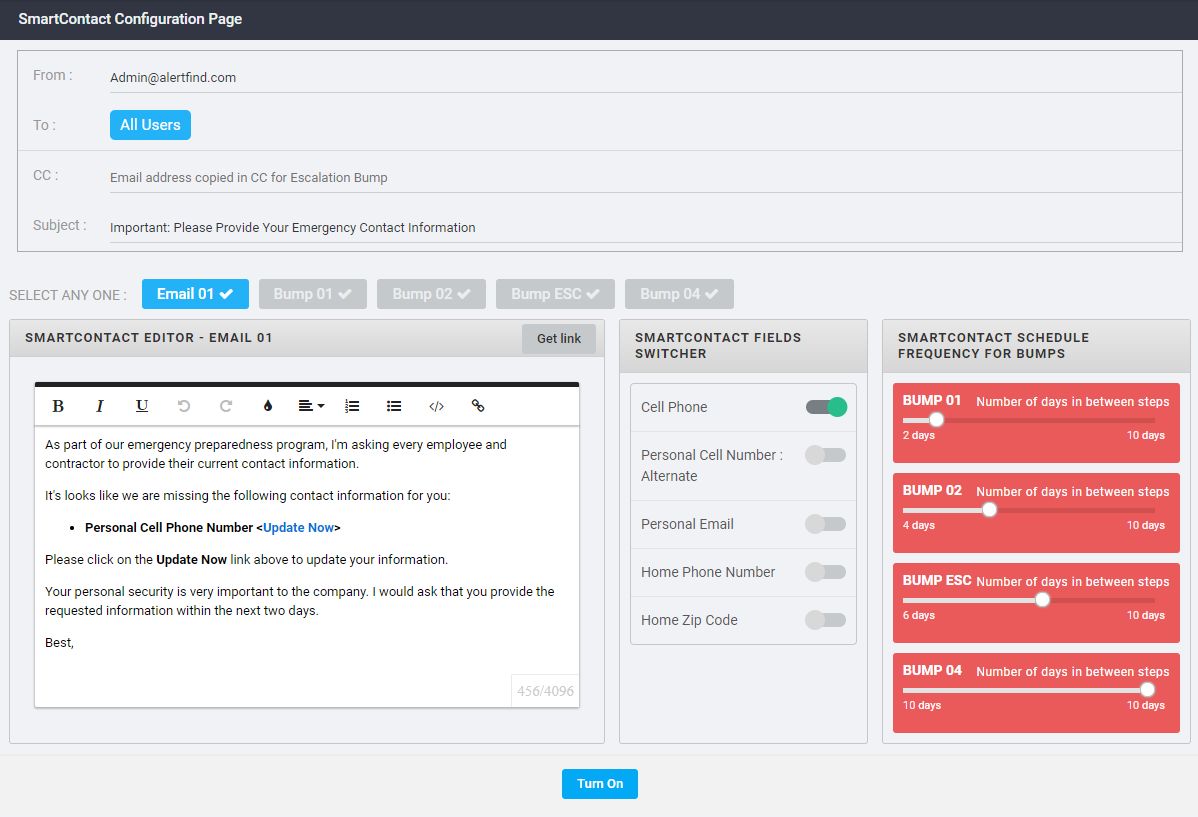
On the configuration page, administrators are able to configure the list of recipients to monitor and run against. By default, Smart Contact run against the full organization list of users. SmartContact skips all users that have complete information available.
To start the configuration:
- Log in to AlertFind.
- Go to Administration > SmartContact.
- Click Configuration.

On the configuration page, Administrators can customize the content and schedule for an email campaign designed to get 100% of recipients to provide their requested contact information. Click Turn On once the requested information is filled.
To complete the configuration page, four areas need to be filled:
The general area contains basic information about the emails to be sent:
| Field | Description |
|---|---|
| From | Email of the sender. |
|
To |
List of recipients. By default, it is set to All Users. |
| CC | Other recipients to be copied. |
| Subject | To be edited according to the email to be sent. |
SmartContact is pre-configured with five email templates to be sent in sequence to users that do not have complete information stored in AlertFind.

The emails will be sent in the sequence that they appear on the interface.
Edit each template accordingly to reflect the previous emails already sent and the necessary action to be taken.
Use the Get Link to add a link to where the user needs to update his information.
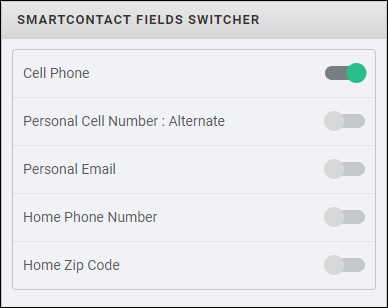
Slide the selector to the right to determine which fields will be added to the check.
NOTE
At the moment, only the option to enable or disable the cellphone is available.
The other options will be available at a later stage.

By default, the Personal Cell Phone Number will be turned on and all others would be turned off. When enabled, the additional fields would also come into the consideration for the lookup.
The available fields to be selected are:
- Cell Phone
- Personal Cell Number: Alternate
- Personal Email
- Home Phone Number
- Home Zip Code
SmartContact offers administrators the possibility to schedule the intervals between emails.

Slide the selector to the right to set the interval between emails. The options available are between 1 and 10 days for each step.