Aurea CRM web Setup
Learn about the aurea CRM web setup.
Starting the Installation
To start the installation of Aurea CRM web:
- Copy the installation file (update.CRM_web _<vertical>_<version number>.exe) to a local drive.
- Start update.CRM_web _<vertical>_<version number>.exe. Setup starts.
Database Type
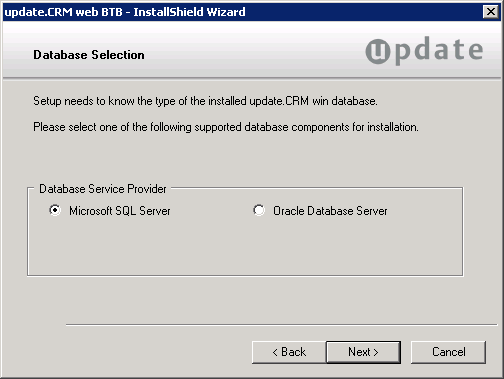
- Select the database type of your Aurea CRM database (MS SQL Server or Oracle Database Server).
- Click Next.
Aurea CRM database Connection Settings
Setup searches for a Aurea CRM win installation. If no mmdb.ini file containing the connection to the Aurea CRM database is found, the following screen is displayed:
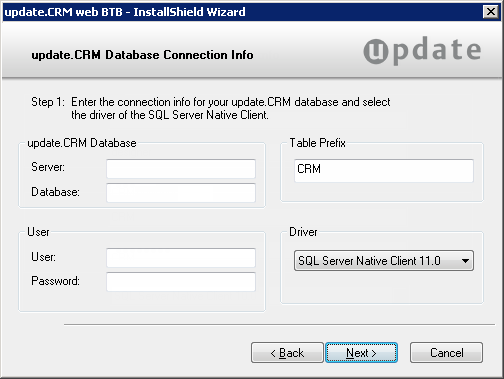
- Enter the connection information:
- Server: Enter the database server name.
- Database: Enter the name of the Aurea CRM database.
- User/Password: Enter the user name and password for the Aurea CRM database.
- Table Prefix: Enter the table prefix.
-
Driver: Select the desired SQL driver in the
Driver field:
- SQL Server Native Client 10.0 for MS SQL Server 2008 R2
- SQL Server Native Client 11.0 for MS SQL Server 2012 and 2014
- Click Next.
CRM.designer Database Connection Settings
Both CRM.designer and Aurea CRM web need a connection to the CRM.designer database. Aurea CRM web and the CRM.designer database can be hosted on a different database server.
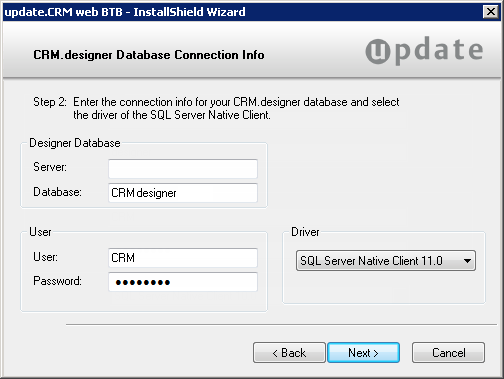
- Enter/verify the connection information:
- Server: Enter the database server name.
- Database: Enter the name of the CRM.designer database.
- User/Password: Enter the user name and password for the CRM.designer database.
-
Driver: Select the desired SQL driver in the
Driver field:
- SQL Server Native Client 10.0 for MS SQL Server 2008 R2
- SQL Server Native Client 11.0 for MS SQL Server 2012 and 2014
- Click Next.
Setup does not verify your settings. The database must either exist already or you need to create it manually.
The connection string is written to Aurea CRM web's settings.xml file (
< designerDsn >entry), see Aurea CRM web.
IIS Virtual Directory and IIS Application Pool
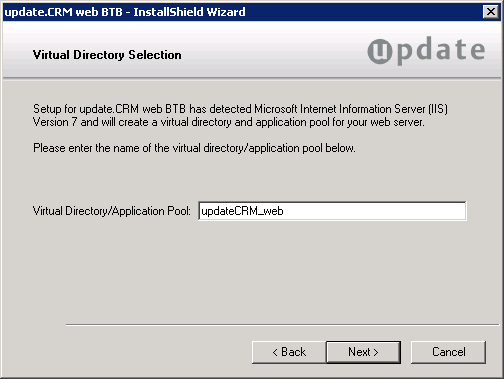
- Enter the name of the Internet Information Services (IIS) Virtual Directory (and
Application Pool) that is created during the setup process.
The virtual directory is the URL of the web application. If you use the default value, you can start Aurea CRM web using the URL
http://<server name>/updateCRM_web. - Click Next.
Destination Folder
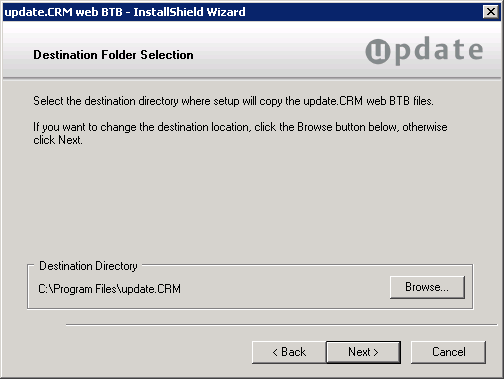
- Choose the target directory.
This directory is the application root directory where setup copies the files. Aurea CRM web is installed in \ update.CRM as root directory, and automatically creates a \Aurea CRM web <vertical> directory with the following directory structure:
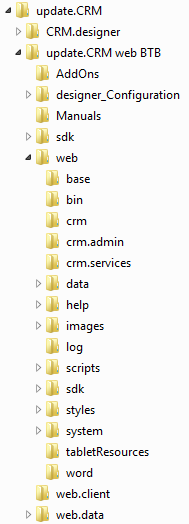
- Click Next.
Installation Summary

- Verify your settings.
- Click Back to change your settings. Click Install to start the installation process. The Aurea CRM web files are copied to the destination directory, the IIS virtual directory is created, etc.
Setup Complete
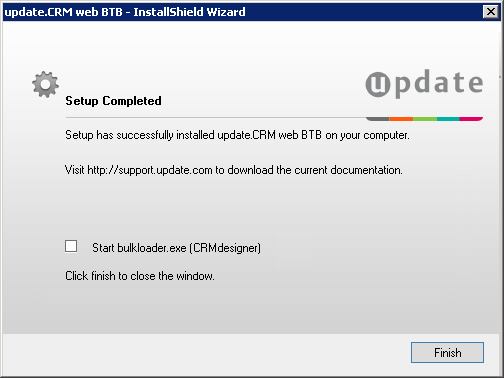
- Check Start bulkloader.exe to automatically start CRM.bulkloader and proceed with setting up the CRM.designer database.
- Click Finish to end the setup process.
Download all documentation from https://support.aurea.com and make it available for your users. The online help (English and German) is automatically installed by the setup process.
Warning: Unable to Copy ..\system\sys
If Aurea CRM win is not installed on your server, a "file copy error" message is displayed.
In this case, the setup process is unable to copy the .. \system\sys directory to the Aurea CRM web directory. To be able to run Aurea CRM web, you must manually copy the .. \system\sys directory from the server where Aurea CRM win is installed to the .. \system\sys directory of your Aurea CRM web installation.