Database attach
This method works best when Bonzai Intranet is the only site collection in the content database and for content databases with multiple site collections that are all being migrated together.
Do not use this approach directly if the content database contains site collections you do not wish to migrate -- you need to move them to a new content database or perform a site collection backup and restore.
In the destination farm, ensure there is no site collection present in the path where you intend the migrated Bonzai Intranet site collection to reside.
For example, if Bonzai Intranet is going in the root site collection ("/") of a web application, ensure there is no site collection at the root.
Another example, if it is going in /sites/Bonzai, ensure this path does not already exist. If the path exists, the database attach into SharePoint fails and the site collection will not be present in the farm.
This applies for all site collections in the database. If you are attaching a database that contains Bonzai Intranet and other site collections, none of the paths used by these site collections should exist in the destination web application otherwise the attach will fail.
Below are the steps to migrate using Database Attach:
In the source farm, determine the content database used by the Bonzai Intranet site collection. This can be done in Central Administration or PowerShell.
Central Administration
- Navigate to Application Management, View all site collections.
- Select the web application and site collection.
- In the table on the right the Database Name row will contain the database name.
PowerShell
- Log in to one of the SharePoint servers in the farm as a farm administrator.
- Open an elevated SharePoint Management Shell.
- Run the following Powershell. (
<url>is the URL of the Bonzai Intranet site collection)
$site = Get-SPSite -Identity <url>
$site.ContentDatabase
For example:
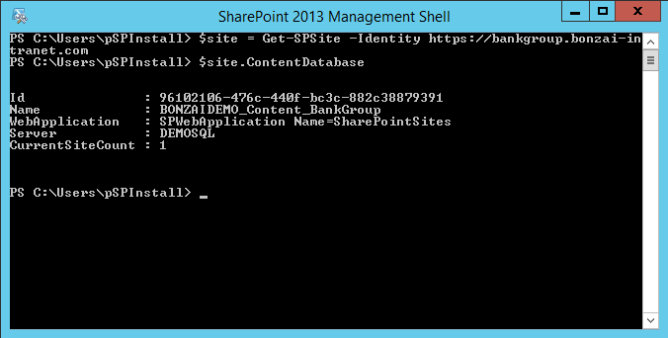
$site = Get-SPSite -Identity https://bankgroup.bonzai-intranet.com
$site.ContentDatabase

Getting the database name in PowerShell
In this example, the database name is BONZAIDEMO_Content_Bankgroup
How you achieve this depends on your requirements, environment, and available tools (e.g. backup/restore, detach/reattach, 3rd party migration, copy database wizard, etc).
The details for moving a SQL Server database between instances is out of scope for this guide.
To summarize, you have to copy the content database from the source environment to the destination environment and make it available in the destination SQL Server.
At the end of this step the source content database containing Bonzai Intranet should be online in the destination SQL Server instance.
Usually, the production and non-production environments do not share the same service accounts. Once the database is online in SQL Server it is necessary to grant permissions for the destination farm service accounts to the content database.
Grant database role permissions to the attached content database for the following accounts:
- Farm service account (i.e. the account running the SharePoint Timer Service) -
db_owner - Farm administrator who attachs the database to SharePoint (i.e. the account you are logged into the SharePoint server with) -
db_owner - Web application pool account -
SPDataAccess
Open the destination instance in SQL Server Management Studio. And perform the following steps:
- Navigate to Security > Logins.
- Select one of the accounts listed above, right click, click Properties.
- Navigate to the User Mapping page.
- Check the Map check box for the attached content database and select the db_owner database role permission (SPDataAccess for the web application pool account).
- Click OK.
Repeat for the other accounts.
Attaching the database can only be performed in PowerShell. In the destination farm:
- Log in to one of the SharePoint servers in the farm as a farm administrator.
- Open an elevated SharePoint Management Shell
- Run the following Powershell, where:
<databasename>is the name of the attached database<BonzaiWebApplication>is the GUID, Name, URL, orSPWebApplicationobject for the destination web application
Mount-SPContentDatabase -Name <databasename> -WebApplication <BonzaiWebApplication>
For example:
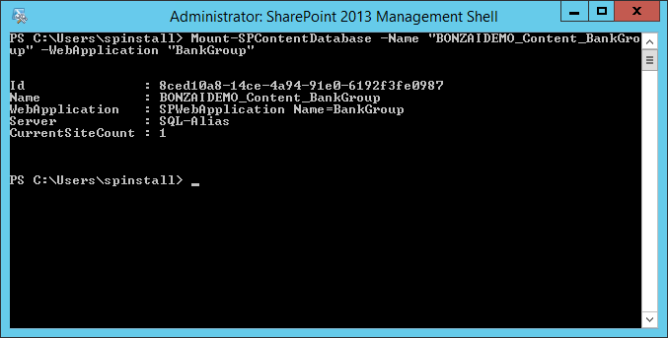
Mount-SPContentDatabase -Name "BONZAIDEMO_Content_Bankgroup" -WebApplication "BankGroup"
The output contains many blocking errors and non-blocking errors and warnings which must be resolved.
Watch for any errors related to Bonzai Intranet solutions (e.g. missing solutions) and resolve before proceeding.

Attaching the migrated content database
Once the database is attached it appears in the list of databases for the Web Application. This can be verified in either Central Administration or PowerShell.
Verify in Central Administration
Navigate to Application Management > Manage content databases and select the web application.
Verifying in PowerShell
- Log in to one of the SharePoint servers in the farm as a farm administrator.
- Open an elevated SharePoint Management Shell
- Run the following in Powershell, where:
<BonzaiWebApplication>is the GUID, Name, URL, orSPWebApplicationobject for the web application where the database was just attached
$wa = Get-SPWebApplication -Identity <BonzaiWebApplication>
$wa.ContentDatabases
For example:
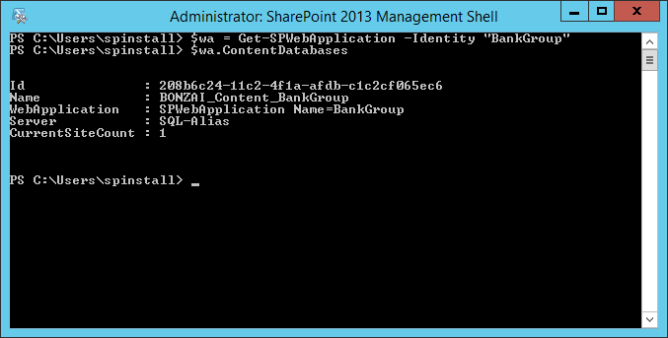
$wa = Get-SPWebApplication -Identity "BankGroup"
$wa.ContentDatabases

Verifying the migrated content database in PowerShell
Continue to the post-migration steps to configure Bonzai Intranet in the destination environment.