Create Reports - General Instructions
Create a report:
- Verify the correct team context. For more information, see Team Security Context.
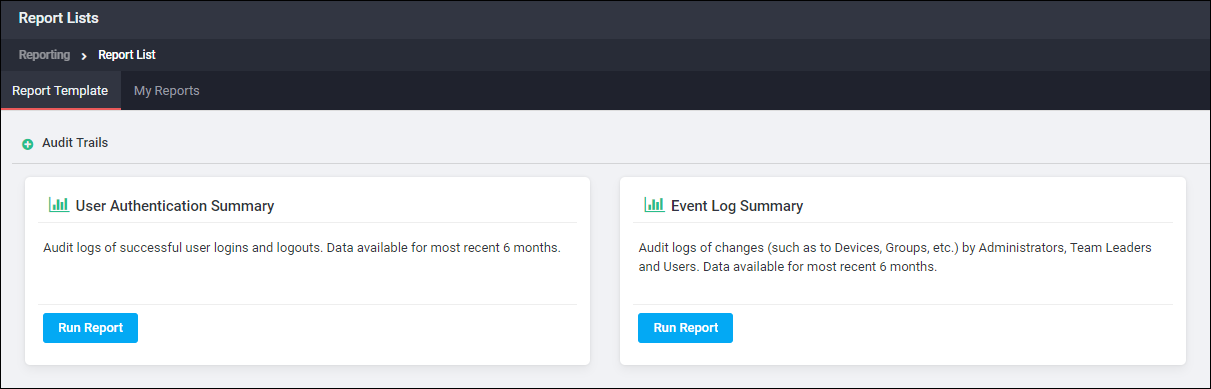
- From the left navigation menu, Reporting section click Report Lists. The available reports appear on the Report Templates tab. Scroll down for more reports.
- Double-click the report to bring up the Define Report Parameters page.
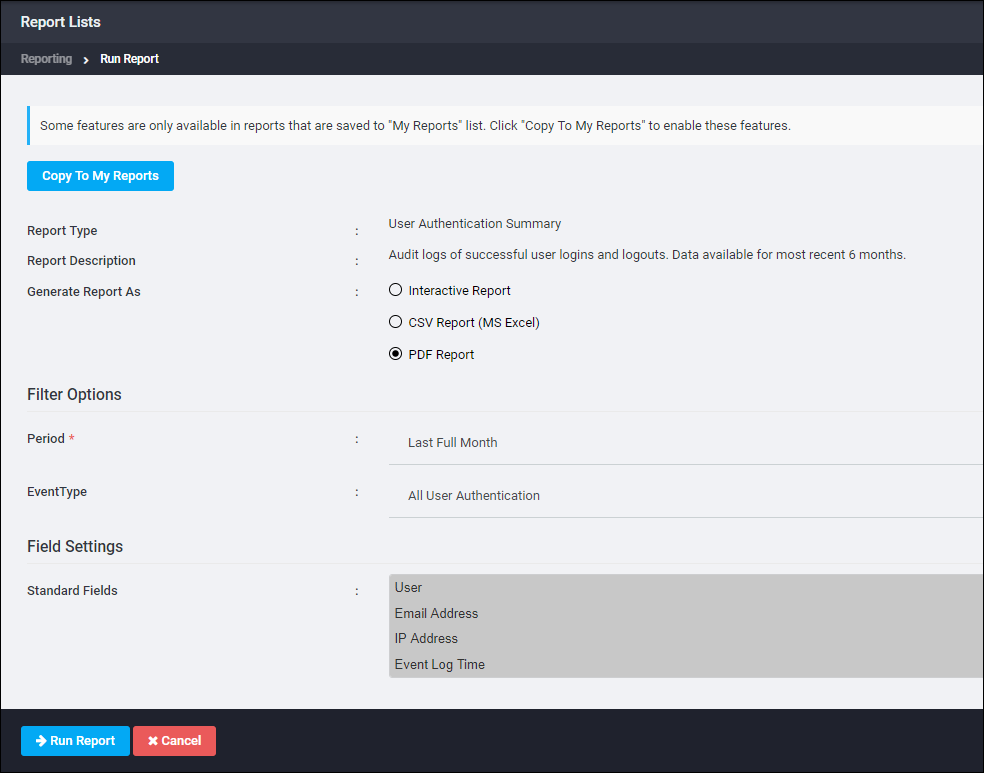
- Choose the report output format from the Generate Report As choices. Not all options are available for all reports.
- Interactive Report: creates a web-based report displayed in the web browser. You can choose to save the report as a PDF or CSV file after you view it in interactive mode. If you cannot see all the fields in the Interactive Report window, you can resize each column of data or the entire window by dragging and resizing with the mouse.
- CSV Report: creates a CSV (comma separated values) version of the file. You have the option of saving the CSV report template on the My Reports tab. You can download the CSV report and open it with any spreadsheet program that handles CSV files. You can also use the Report Notification Editor to send a generated CSV report to recipients. See Set Notification Options.
- PDF Report: creates a PDF version of the file. You have the option of saving the PDF report template as a report on the My Reports tab. You can download the PDF report and open it with Adobe Acrobat Reader. You can also use the Report Notification Editor to send a generated PDF report to recipients. See Set Notification Options.
- Preview Report: displays a subset of data in the web browser. It does not display the full data set. For full reports, you must save as PDF or CSV and view the saved report.
NOTE:
- When you generate a report as PDF or CSV, or when you save an interactive report, the report appears in the Pending and Completed Reports section at the bottom of the Report Lists page. See Pending and Completed Reports .
- The Advanced Options section is grayed out until after you have copied a report configuration to My Reports. See Report Lists - My Reports for information on saved reports.
- If you are planning to save a customized report to run on a recurring schedule, set the Filter Options and Field Settings options first, copy the report to My Reports, and then set the Advanced Options. See Configure and Save Custom Reports for instructions.
- Under the Filter Options section, the report results can be narrowed by setting options that are unique for each report. See the specific report detail section for information on available fields and search criteria.
- If you provide no specific search criteria, the search returns all information available for your current team context.
- Many reports allow defining the report time Period. See Define a Report Time Period for definitions of the data returned.
- Many reports allow access to the Criteria Editor. See Using the Criteria Editor.
- Under Field Settings is a list of all the
Custom FieldsandStandard Fieldsavailable for this report. The listed fields vary for each report. See the specific report detail section for information on fields available. Select which fields are to be included in the report. All fields are preselected, which is shown as the field names being displayed with a blue background. To unselect a field, click it and the backgrounds turns white. To reselect it, click it a second time. - To run this report with the options selected, click Run Report. AlertFind generates the report.
- If Interactive or Preview report are selected, the report is displayed in a new window.
- On the View Report page, click Edit to change the report parameters and run it again. You can also click Save as PDF or Save as CSV to save the report.
- If PDF or CSV output is selected, the report will be run in the background. See Pending and Completed Reports.
- To save this report configuration as a custom report under the My Reports tab, click Copy to My Reports. This will make the additional fields available such as a Report Title to label the saved report. See Configure and Save Custom Reports for instructions.
Define a Report Time Period
All reports have a Time Zone automatically included in the time Period.
Under the Filter Options section, many reports allow the report results set to be narrowed by defining the report time Period.
- Today—Returns entries from midnight today up to time the report is run. This is always a partial day report. If the report is run at 2:37PM (14:37), it will cover the hours from 0:00 to 14:37.
- Yesterday—Returns the full 24-hour report for yesterday, starting at midnight yesterday and ending at midnight today. If the report is run on November 29, the report will contain all of the information from YYYY-11-28 0:00 to YYYY-11-29 0:00.
- Last Full Hour—Returns the report for the last completed full hour. If the report is run at 2:37PM (14:37), it contains data from 1:00-2:00PM (13:00 to 14:00).
- Last Full Week—Returns the report for the last completed full week, from midnight on Sunday of the previous week up to midnight last Sunday. If the report is run on Wednesday, November-29, it will contain information from midnight on Sunday, November-19 (YYYY-11-19 0:00) up to midnight on Saturday, November 25 (YYYY-11-25 0:00).
- Last Full Month—Returns the report for the last completed full month, from the first day of the previous month to the first day of the current month. If the report is run on November 29, it will contain information from midnight on October 1 (YYYY-10-01 0:00) up to midnight on November 1 (YYYY-11-01 0:00).
- Last Full Year—Returns the report for the last completed full year, from the first day of the previous year to the first day of the current year. If the report is run on November 29, 2010, it will contain information from midnight on January 1, 2009 (2009-01-01 0:00) up to midnight on January 1, 2010 (2010-01-01 0:00).
- Last 12 Full Months—Returns the last twelve complete months of data. If the report is run on November 29, 2010, it will contain information from midnight on November 1, 2009 (2009-11-01 0:00) up to midnight on November 1, 2010 (2010-11-01 00:00).
- Specific Dates—Returns the report from the
Start Datedate and time up to theEnd Datedate and time. Use the calendar icons to set the start and end dates, and the drop-down menu to select the times.
Pending and Completed Reports
All PDF and CSV reports are run in the background so you can continue to perform AlertFind functions while the reports are processing. After a PDF or CSV report has been initiated, it is added to the Pending and Completed Reports pane. Also, all PDF or CSV reports initiated from the My Reports tab are listed in this pane.
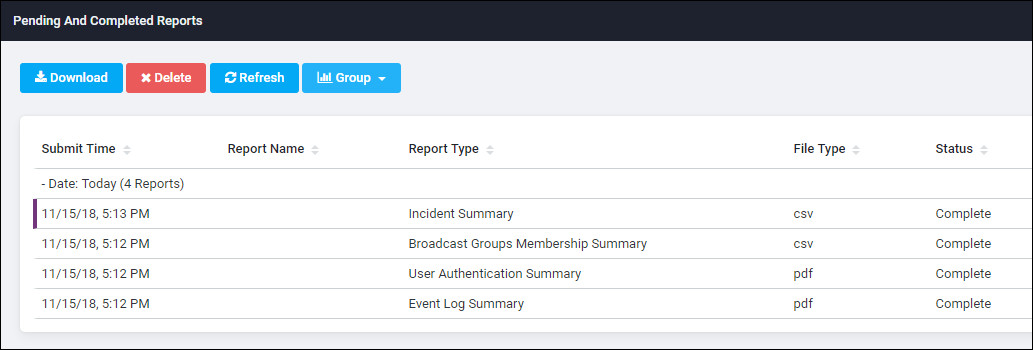
When the report has finished processing, the Status changes from Pending to Completed. The Status refreshes automatically, but if you want to check the report’s status before the page refreshes, click the Refresh button.
To open or download a report, either click once on the report’s table row to select the report and then click the Download button, or just double-click the report’s row. If multiple reports are selected, only the first report is downloaded.
All PDF and CSV reports are retained in case you want to view them at a later date. When you view a report listed in the Pending and Completed reports table, you are viewing a saved report, not regenerating the report. Each report contains the date it was generated.
To remove a report from the list, select the report and then click the Delete button. You can select a range of reports to delete using the SHIFT key or several reports using the CTRL key.