Filtering Lists
Many user and group lists allow filtering to aid in finding a specific user or group, or sets of users or groups.
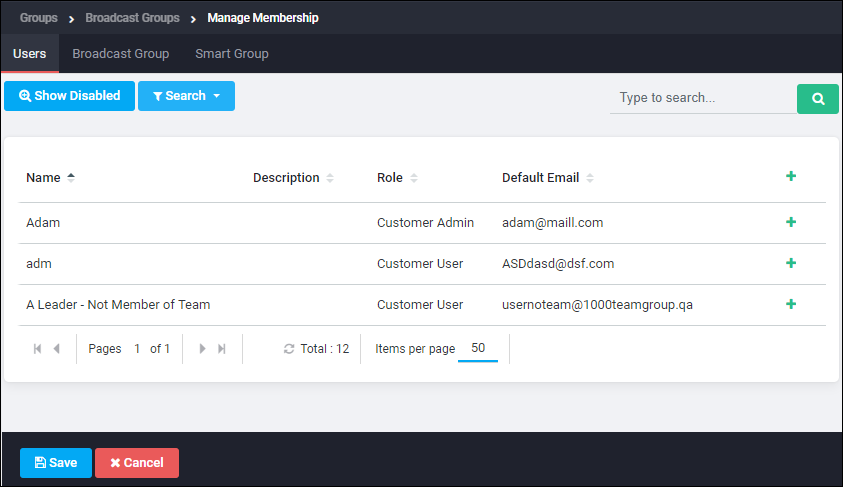
To access a filtering list navigate to Groups > Broadcast Groups.
Select a group and click View Details.
On the Group Membership tab click Manage Membership.
To filter controls for lists
- Alphabet Control: Click the first letter of the user’s or group’s name to jump to a list of users or groups that begin with that letter.
- Page Controls: Use the First and Previous, Next and Last buttons as necessary to locate the page containing the user or group.
- View Details: Brings up the pane showing details of the user or group selected.
- Edit: Brings up the pane to edit the user or group selected.
- Delete: Deletes the currently selected user or group. A confirmation box will appear to verify the deletion.
- Download: Downloads a user or group report(s) based on the context.
- Compose To: Brings up the Notification Editor pane, to compose a notification to the user(s) or group(s) selected.
- Show sub-team: Toggle the Show sub-team button to show or hide sub-team like a branch or a particular region.
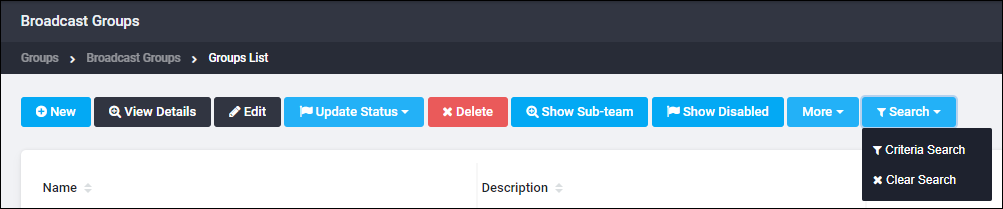
- Filter. Click Filter to create a new filter criteria or to delete an existing filter.
Running a simple search
Enter the first few letters of the name into the Search box, and then click Search ![]() .
.
The list of items that fit the search criteria will be displayed.

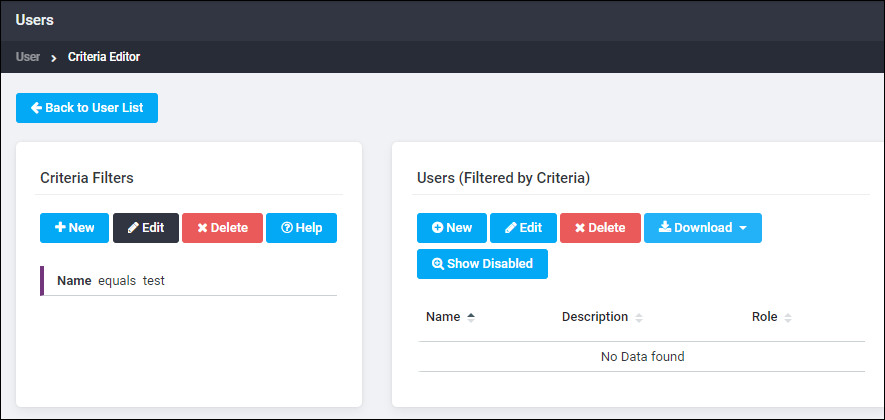
Using the Criteria Editor
The Criteria Editor can be accessed through several mechanisms:
- From most user or group pages, click the Search button, then select Criteria Search from the list.
- On the reports pages, the button label will depend on the context, for instance: Edit Criteria, Group Filter Options, Incident Filter Options, or Notification Criteria.
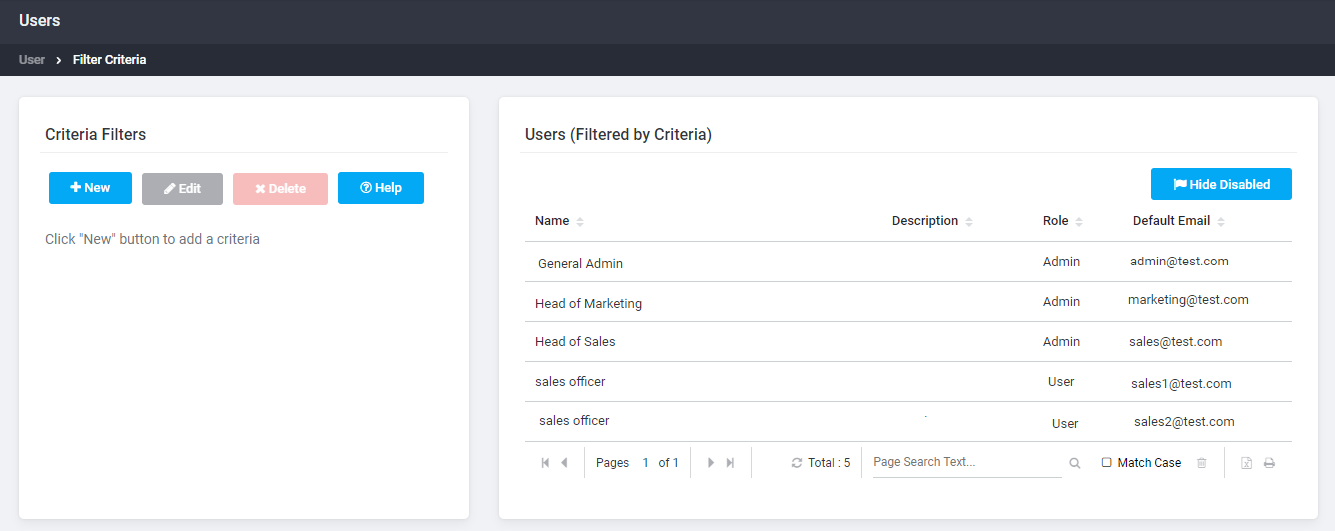
The Criteria Editor appears. The left pane displays any filters being applied, and the matching items are displayed in the right pane. By default, no criteria filters are applied when you first view the Criteria Editor; therefore, all users, groups, incidents, etc. are displayed in the right-hand pane.
To create a new criteria filter:
- Click New. The Select a Custom Field dialog box appears, with a list of all default fields and any custom fields defined for your organization.
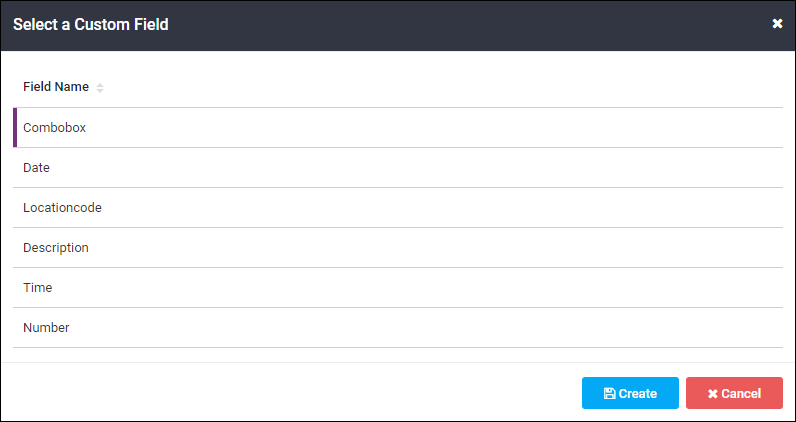
- Click on a field name to select it for the desired filter, and click Create.
- In the Edit Criteria dialog box, click Operator drop-down to select the search criteria.
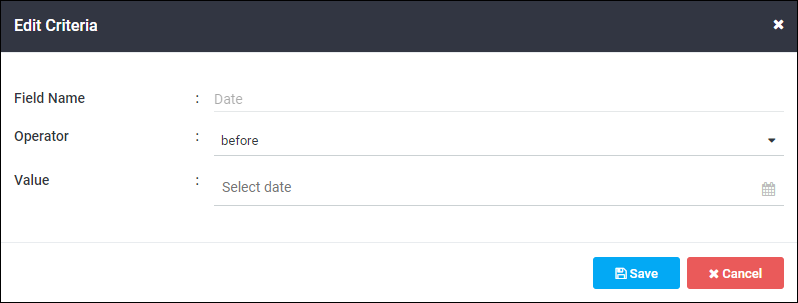
The operators that can be used depend on the type of field selected. These include:
| Field type | Operator description |
|---|---|
| Text fields |
For most of these operators, only one text value may be entered. The The The
|
| Numeric fields |
Only the characters 0-9 are allowed to be entered into the Value field. |
| Date fields |
For date fields, the Value entry box will change to Date and Time selection fields. |
- After the Operator is selected, enter the criteria value into the Value field.
- Click the Save button to return to the Criteria Editor, which lists the search criteria in the left section, and everything that meets the criteria in the right section.
- Click Save to save these criteria and return to the previous screen.
- If the Criteria Editor was accessed from the search drop-down, the search text box contains the number of criteria applied.
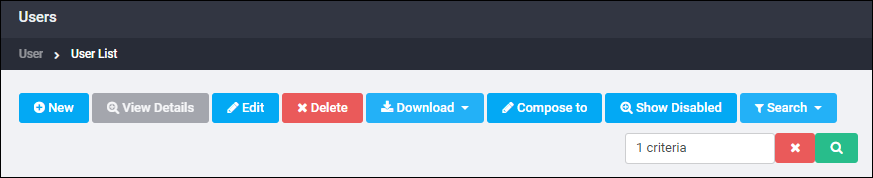
- To remove the search criteria, click the red X.