Use the Response Editor
Use the Response Editor to set the available responses for this notification. A default set of responses are available when a template is chosen. See Use the Notification Editor for a list of template types and default responses.
All responses provided must be options, because they will follow the words “Press n” for voice notifications. For example, a response for a first responder notification might read “if you will take action on this notification.” AlertFind prepends “Press n” to the response text so that the recipient hears “Press 1 if you will take action on this notification.”
IMPORTANT
Instructional text will be included in the SMS indicating that the user should check their email for the audio and/or the attachments. Each available response will be listed by the abbreviation for the response, not the full response text.
Example Chunked SMS Messages
1 of 3 (From TMobile Device Notification System) Mike Rosenfelt has lost his car keys. Your presence is requested immediately on a conference call to discuss
2 of 3 (From TMobile Device Notification System) this crisis. The conference call phone number is 1 (866) 489-0573 and the meeting ID is 7696151. Attachments
3 of 3 (From TMobile Device Notification System) included in email. Reply with 9649 to respond Attend, 9071 to respond No Attend.
NOTE
Type the responses in the language selected for this notification. To create responses in another language, choose a different language from the View drop-down list.
Create additional responses from the Notification Editor:
- In the Notification Editor Responses section, click Add. The Response Editor window is displayed. The following is an example of the Response Editor window with all the available response options.
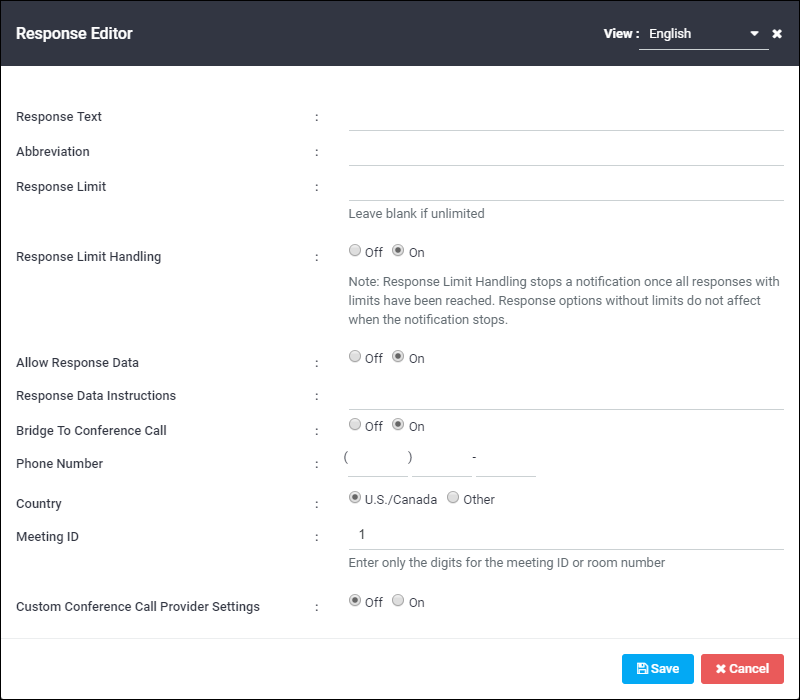
- In the Response Text field, type the response to be created. This is the text that is sent in text notifications and spoken in voice notifications.
- In the Abbreviation field, type the response abbreviation. For example, Confirmed for I confirm that I have received this message, or Attend for I will attend the meeting.
- In the Response Limit field, enter a limit number If there is a limit to the number of users who can select this response. For example, for a first responder notification, type 1 in this field. (If you are using the first responder template, this is automatically set to 1.) If you set a response limit, also set Response Limit Handling to On.
- Set Allow Response Data to On if you want to allow recipients to enter data in response to the notification. This displays the Response Data Instructions field. Enter here the instructions recipients see or hear when they are prompted to enter numeric data. For example, this field might say, “Enter your current contact phone number including area code.”
- To bridge recipients to a conference call, set Bridge to conference call to On. This displays fields for setting a US or international phone number and a meeting ID.
NOTE
The correct format for an Other phone number is:
[COUNTRY_CODE][CITY AREA_CODE][PHONE_NUMBER].
Numbers that include '0' between the country code and the city/area code are invalid in AlertFind. For example, the phone number 44(0) 207 333 4444 is invalid.
However, a UK number such as 44 20 7333 4444 is valid. In this example, the area code for London (20) is separated by spaces from the rest of the phone number. AlertFind will eliminate spaces so that number will become 442073334444.
- To include a prefix or suffix to the meeting ID, set Custom conference call provider settings to On. Set AnswerOnMedia to On only if AlertFind cannot connect to the conferencing bridge using the bridge number, meeting ID, and any required suffices or prefixes. If you are able to connect a conference call using the standard fields, there is no need to enable AnswerOnMedia. This option enables AlertFind to connect the user to the conference call bridge the moment the initial ring is heard, rather than wait for the bridge to pick up. This means a user will hear the ringing tones once he or she selects the transfer option. Use this feature only when a conference call bridge has a habit of not connecting a call when it picks up the transfer.
- When you are finished editing the response and response options for this notification, click Save to return to the Notification Editor.