Configuring a tile
CRM.mobile lets you fully configure a tile like its visibility, text, image, and action.
Tiles are configured via menu actions using a Tile:* action template.
Make sure you follow the naming convention when creating your own tiles: Tile:* (e.g. Tile:TodaysActivities, Tile:CompanyRevenue, etc. in update.tablet).
To configure a tile:
- Edit an existing menu action or create a new one.
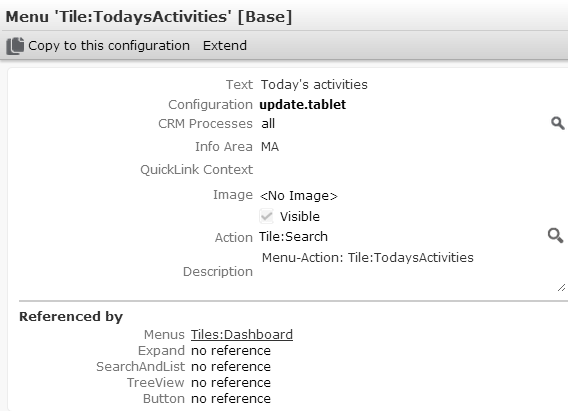
- Specify the following:
-
Text: The label to be
displayed on the tile. If undefined, the info area name is used (
{inofarea:1}).The following placeholders are available:
-
{1}...the result, i.e. usually the number of records found (for Search tiles). The number is displayed in the top left corner of the tile.If no record is found, "0" is displayed, i.e. the tile is not hidden.
-
{infoarea:1}...the info area's name: Depending on the number of found records, the singular or plural is used.
The text is displayed in max. two lines, left- and bottom-aligned in uppercase. The font size is fixed, the line break is automatically inserted between words.
If the text length exceeds the available space, the text is clipped with "..." (browser-dependent).
For Record tiles you define one or more fields to be displayed on the tile.
-
- CRM Processes: Assign one or more CRM processes to the menu action, >> Assigning CRM Processes in the update.CRM web Administrator Guide.
-
Info Area: Use this
option to hide a tile depending on the current user's access rights (Deny Access), e.g.
Tile:TodaysActivitiesis only visible for users with access to info area MA.Note: Notes: Make sure you set this option for all tiles that access info areas that you locked via the rights definition. Otherwise an error is displayed in CRM.mobile.Note: Restricting the visibility of a tile based on specific info area rights (e.g. viaMA:update,new) is currently not supported by CRM.mobile. -
Image: Select an image
to be displayed on the tile. The images must be registered in CRM.designer. For
further details, see Images.
The image is displayed in the upper right corner of the tile.
For Record tiles you can alternatively specify images via action parameters. For further details, see Tile-Record.
-
Action: Define the
desired
Tile:*action, e.g. use theTile:Searchaction template for a Search tile orTile:Recordfor a Record tile. For further details, see Action templates.
QuickLink Context and Visible are not supported by CRM.mobile.
-
Text: The label to be
displayed on the tile. If undefined, the info area name is used (
- Integrate the tile in the page where you want to display it. For further details, see Arranging tiles on a page.
Arranging tiles on a page
The display of tiles on a page is determined by their order in the
context menu: Depending on the defined size they are arranged in one or more rows. The tile
size is determined by the size argument of
the action (e.g. Tile:Search). For further
details, see size. The tiles are scaled dynamically according to the screen width.
Examples in update.tablet: Tiles:Home,
Tiles:Company. You can add any number
of tiles.
The list of tiles is dynamically reloaded when scrolling down.