Setup and installation
In order for CRM.service client to be installed successfully, the minimum system requirements must be met and the installation process must be followed.
In order to install CRM.service client:
- Log on to Windows with administrator privileges.
- Free disk space required: approx 250 MB.
- An additional 130 MB of disk space is required by the installation process and for copying files.
- Ensure you are using a supported operating system.
Installing CRM.service client
If you need the setup for CRM.service client, contact your update representative.
To install CRM.service client:
- Copy
CRM.service_client_<vertical>_<version number>.exeto your local drive and start it.Note: Do not start the file from a network drive. - The installation files are unpacked (per default into
c:\temp\CRM.service
            client <vertical>
). The setup program should start automatically. If the installation does not begin automatically, run setup.exe manually.The installation starts and the Welcome dialog box is displayed.
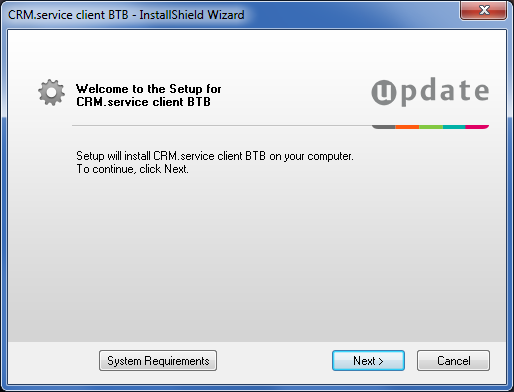
- Click on Next.Note: Setup tests whether CRM.service client is already installed. If the corresponding Windows registry entries are found, setup is cancelled.
The Select Installation Folder dialog box is displayed.
By default, CRM.service client is installed in the following directory:
C:\Program Files\update.CRM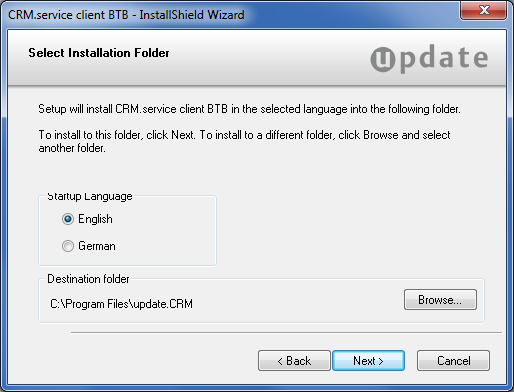
- Select the desired language (English or German). To select another directory, click on Browse.
- Click on Next. The Installation Summary
dialog box is displayed.
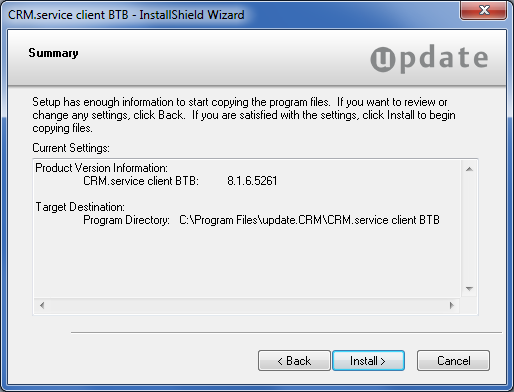
- Verify your settings. Click Back to change your installation settings.
- Click Install to start the installation process.
Setup copies the program files to the directory you have specified.
- Click Finish to end the installation.Note: CRM.service client setup installs .NET Framework 4.5 automatically.Installing Hotfixes
See the Installing Hotfixes document available from https://help.aurea.com/crm/ for details on installing hotfixes.